> For the complete documentation index, see [llms.txt](https://docs.edgetag.io/llms.txt). Markdown versions of documentation pages are available by appending `.md` to page URLs; this page is available as [Markdown](https://docs.edgetag.io/channels/google-ads/faq.md).
# FAQ
### How to create browser and server conversion actions?
#### Browser Conversion Action
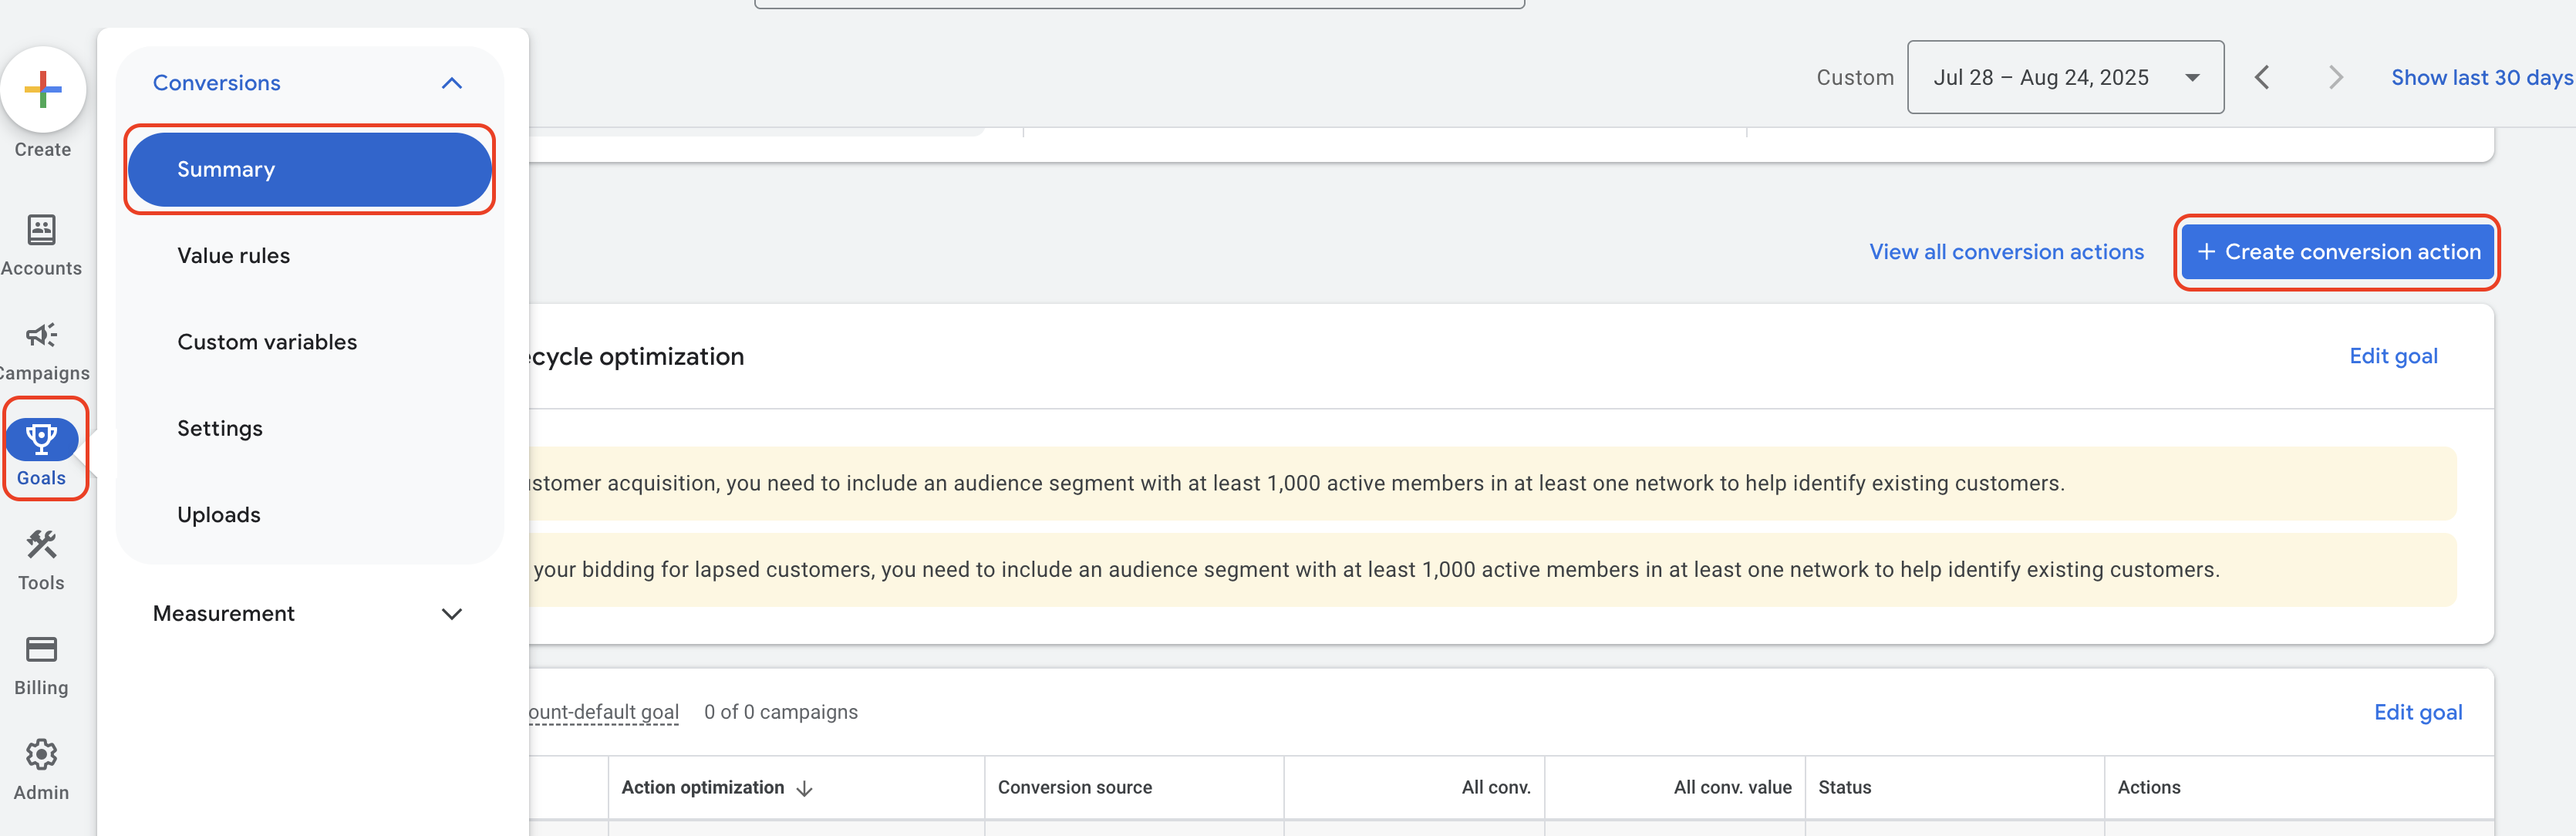
Please click on "Goals" -> "Summary" and then click on "+ Create conversion action".
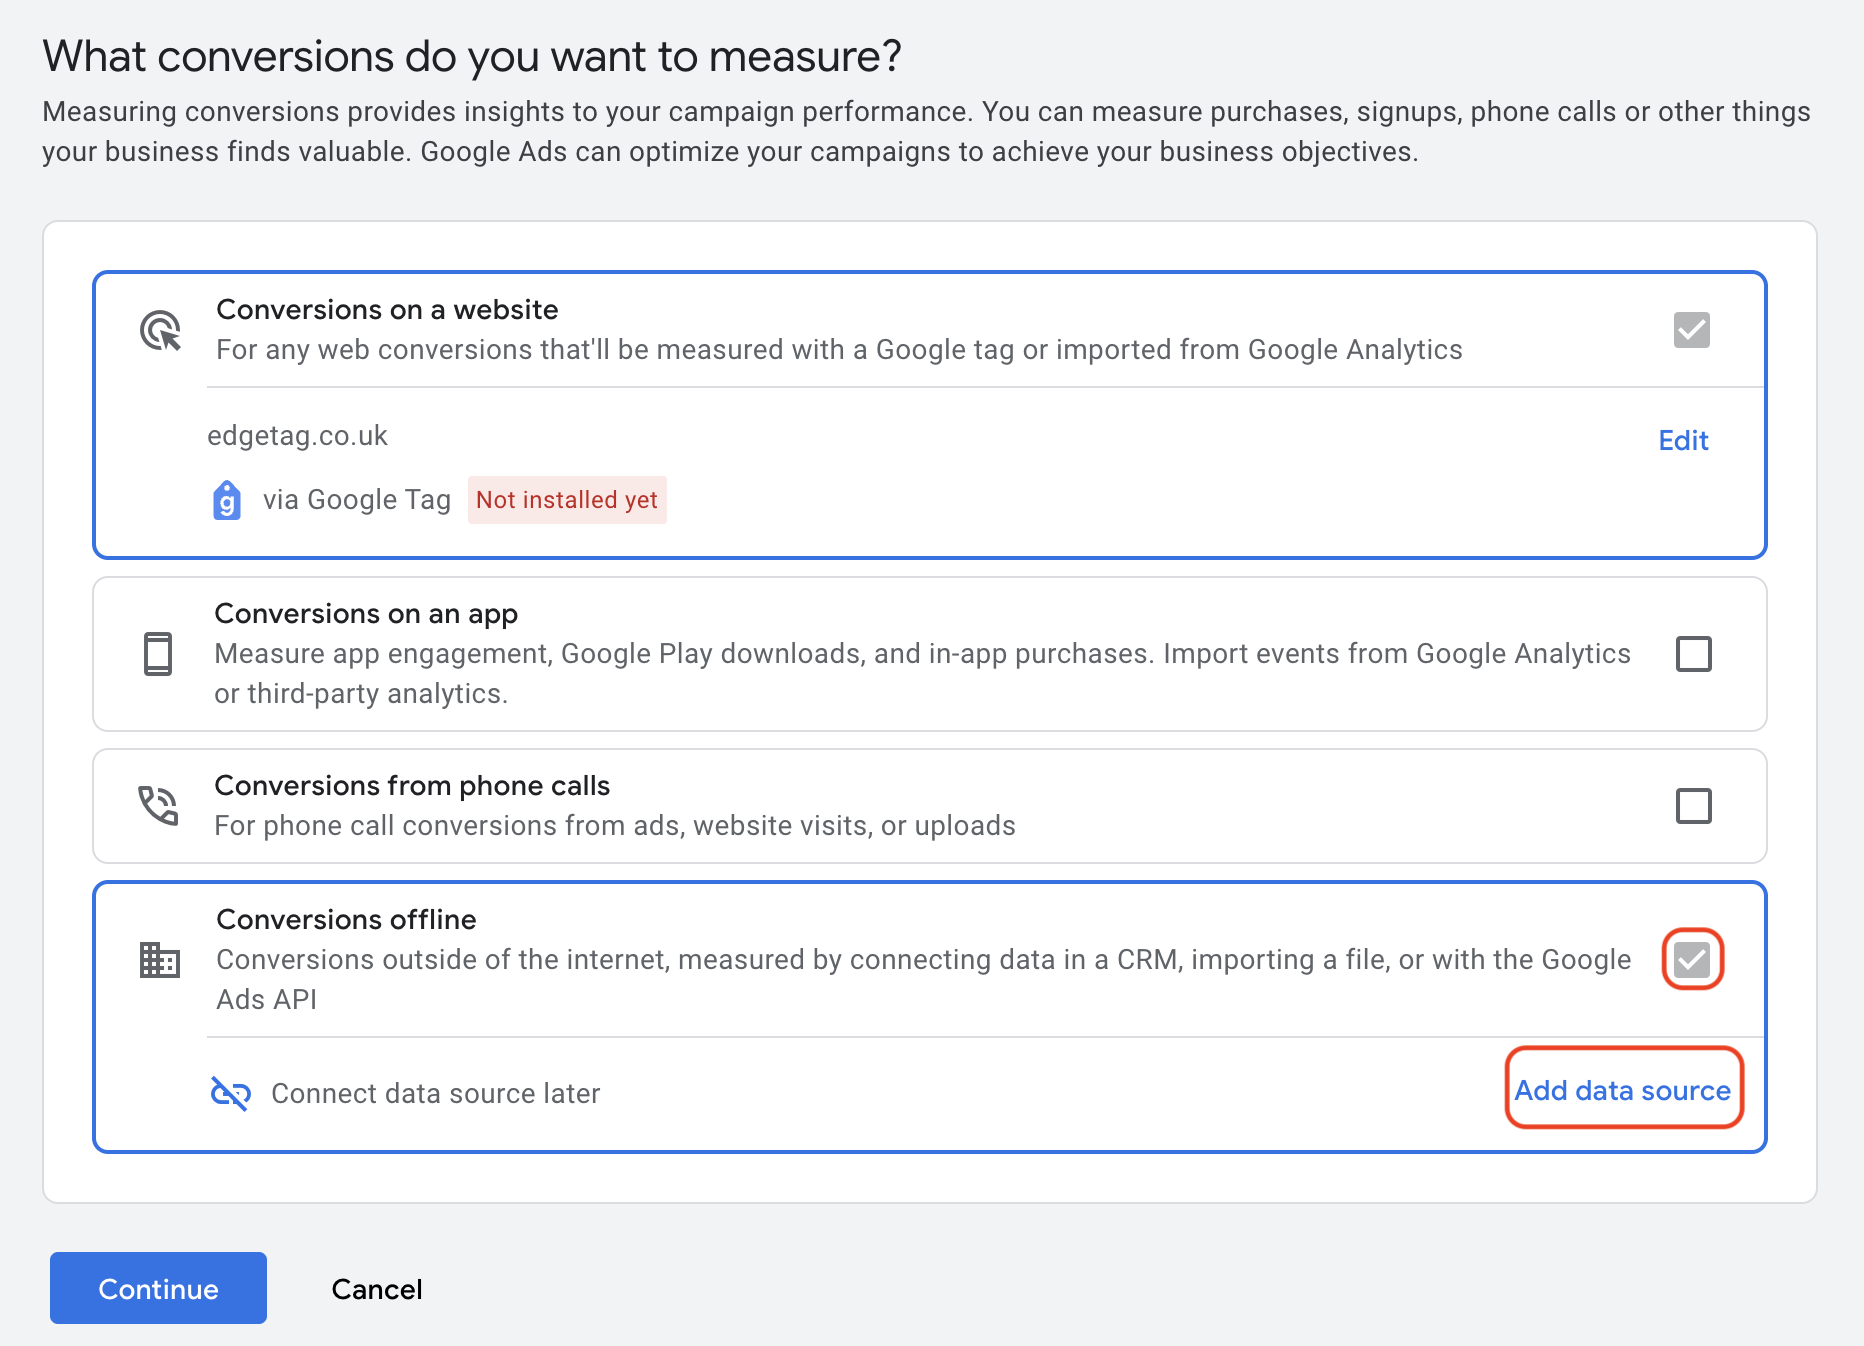
Make sure the checkbox is enabled, as highlighted in the image below. If not, please enable it. If the website is not yet configured, please click 'Edit' and configure the website accordingly. After that, please click "Continue."
In the next step, select the category for which you want to create a conversion action. I have selected Purchase since I want to track Purchase events.
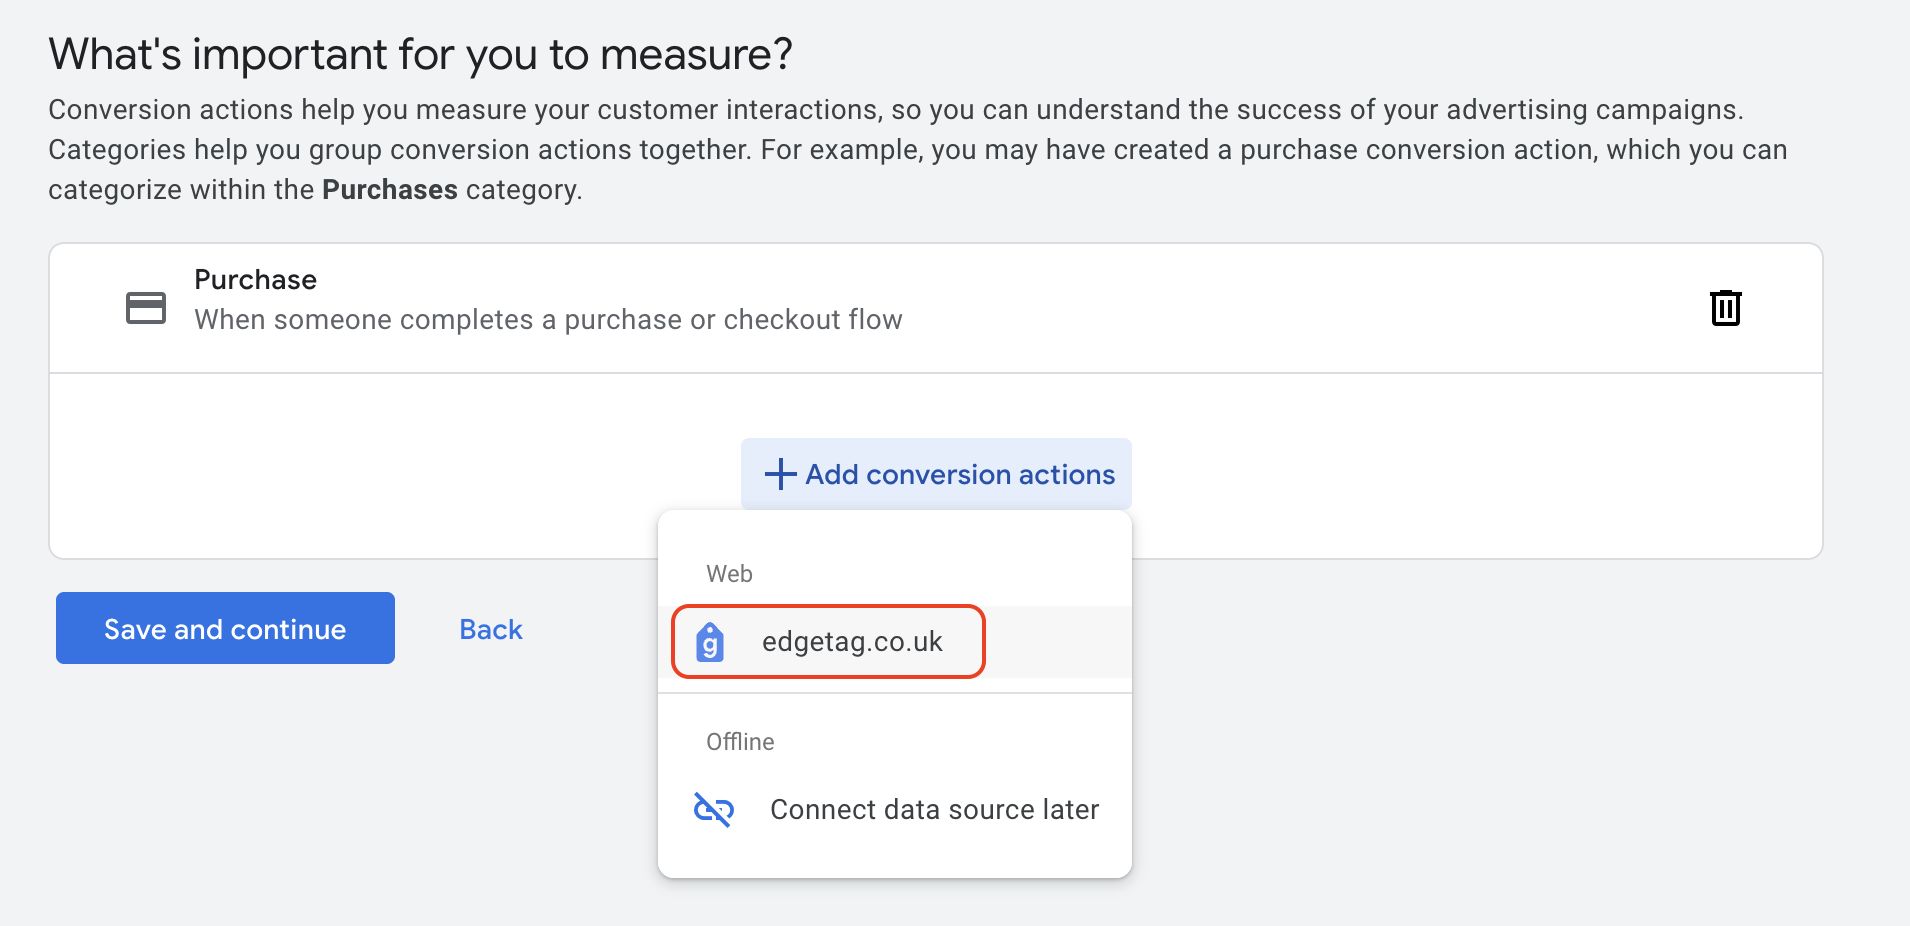
Once the category is selected, please click on Add conversion actions and select the web option (since we are creating a browser conversion action).
Once the web source is selected, in the pop-up, please select the 'Setup manually using code' option and configure the conversion action settings, such as the conversion action name and click-through windows.
{% hint style="info" %}
If you already have primary conversion actions, please change Action optimization to secondary to not affect existing campaigns. Later, once the data looks good, we can move it to the primary.
{% endhint %}
Please click 'Done' once the conversion action configuration is complete. Click "Save and Continue" to proceed.
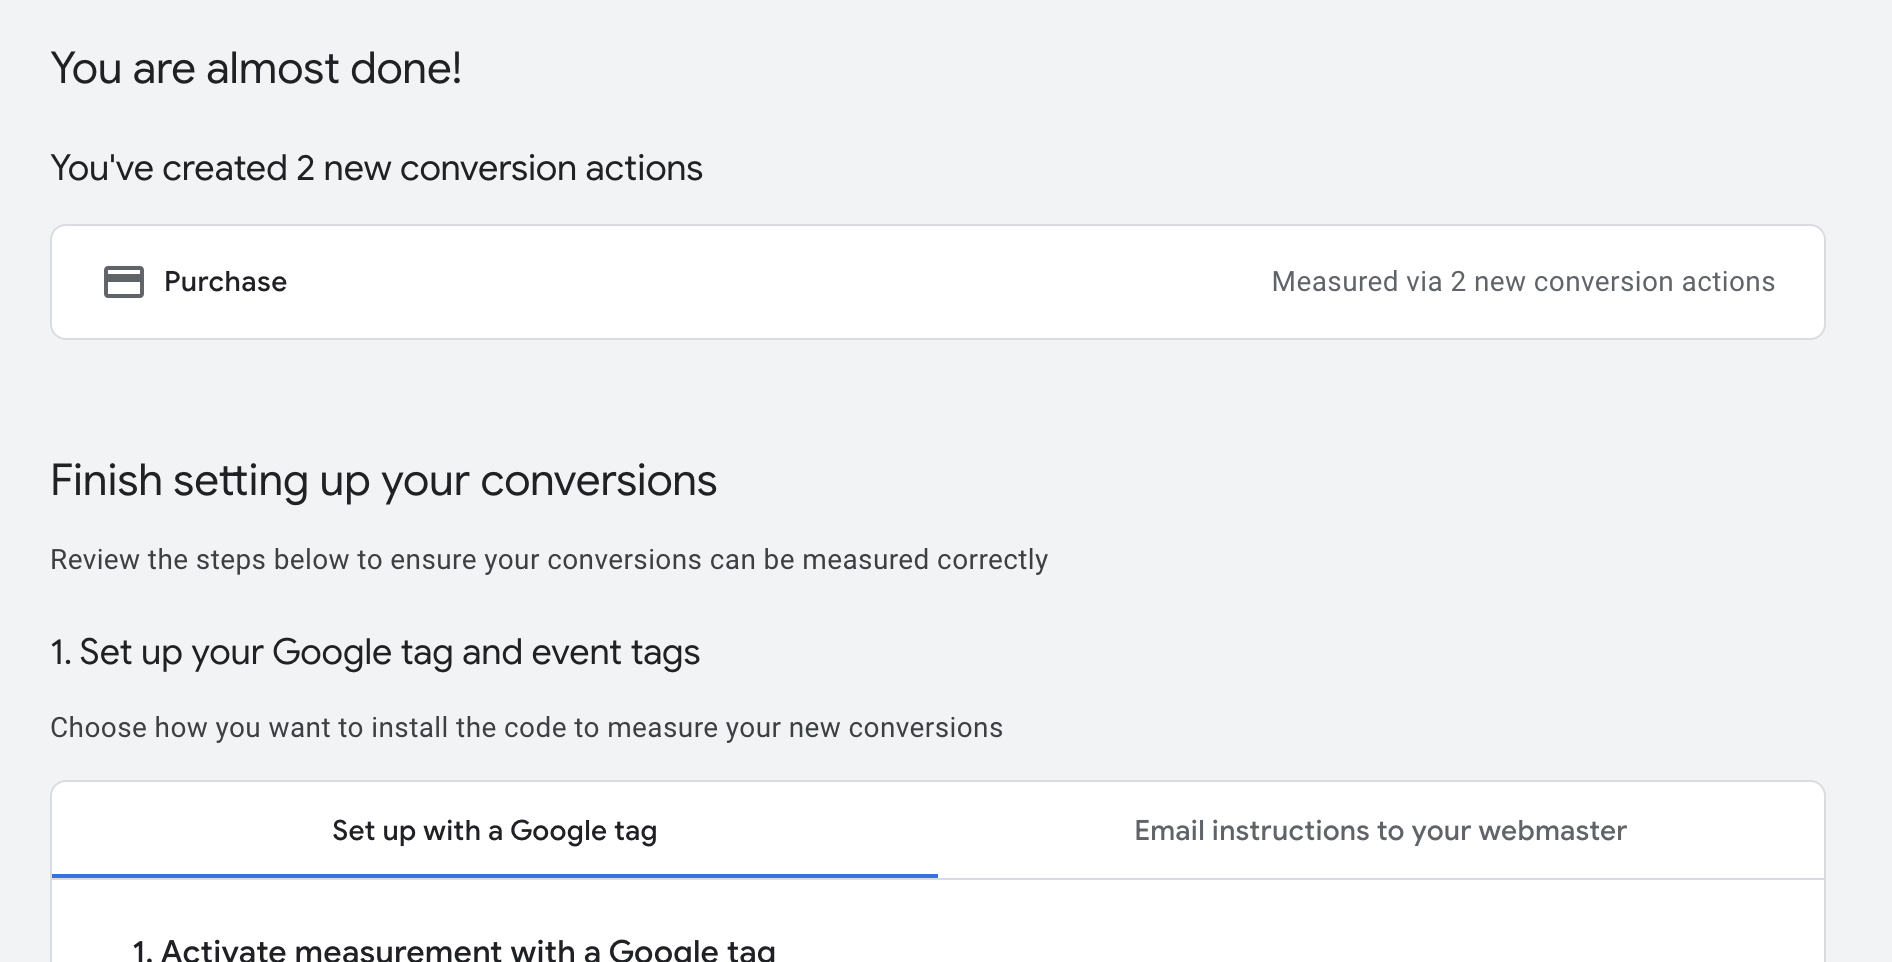
The conversion action has been created successfully. Click 'Done' and you will be redirected to the Conversions summary page.
You should now see the browser conversion action we just created in the dashboard.
#### Server Conversion Action
Please click on "Goals" -> "Summary" and then click on "+ Create conversion action".
Make sure the checkbox is enabled, as highlighted in the image below. If not, please enable it. If the website is not yet configured, please click 'Edit' and configure the website accordingly. After that, click "Continue."
In the next step, select the category for which you want to create a conversion action. I have selected Purchase since I want to track Purchase events.
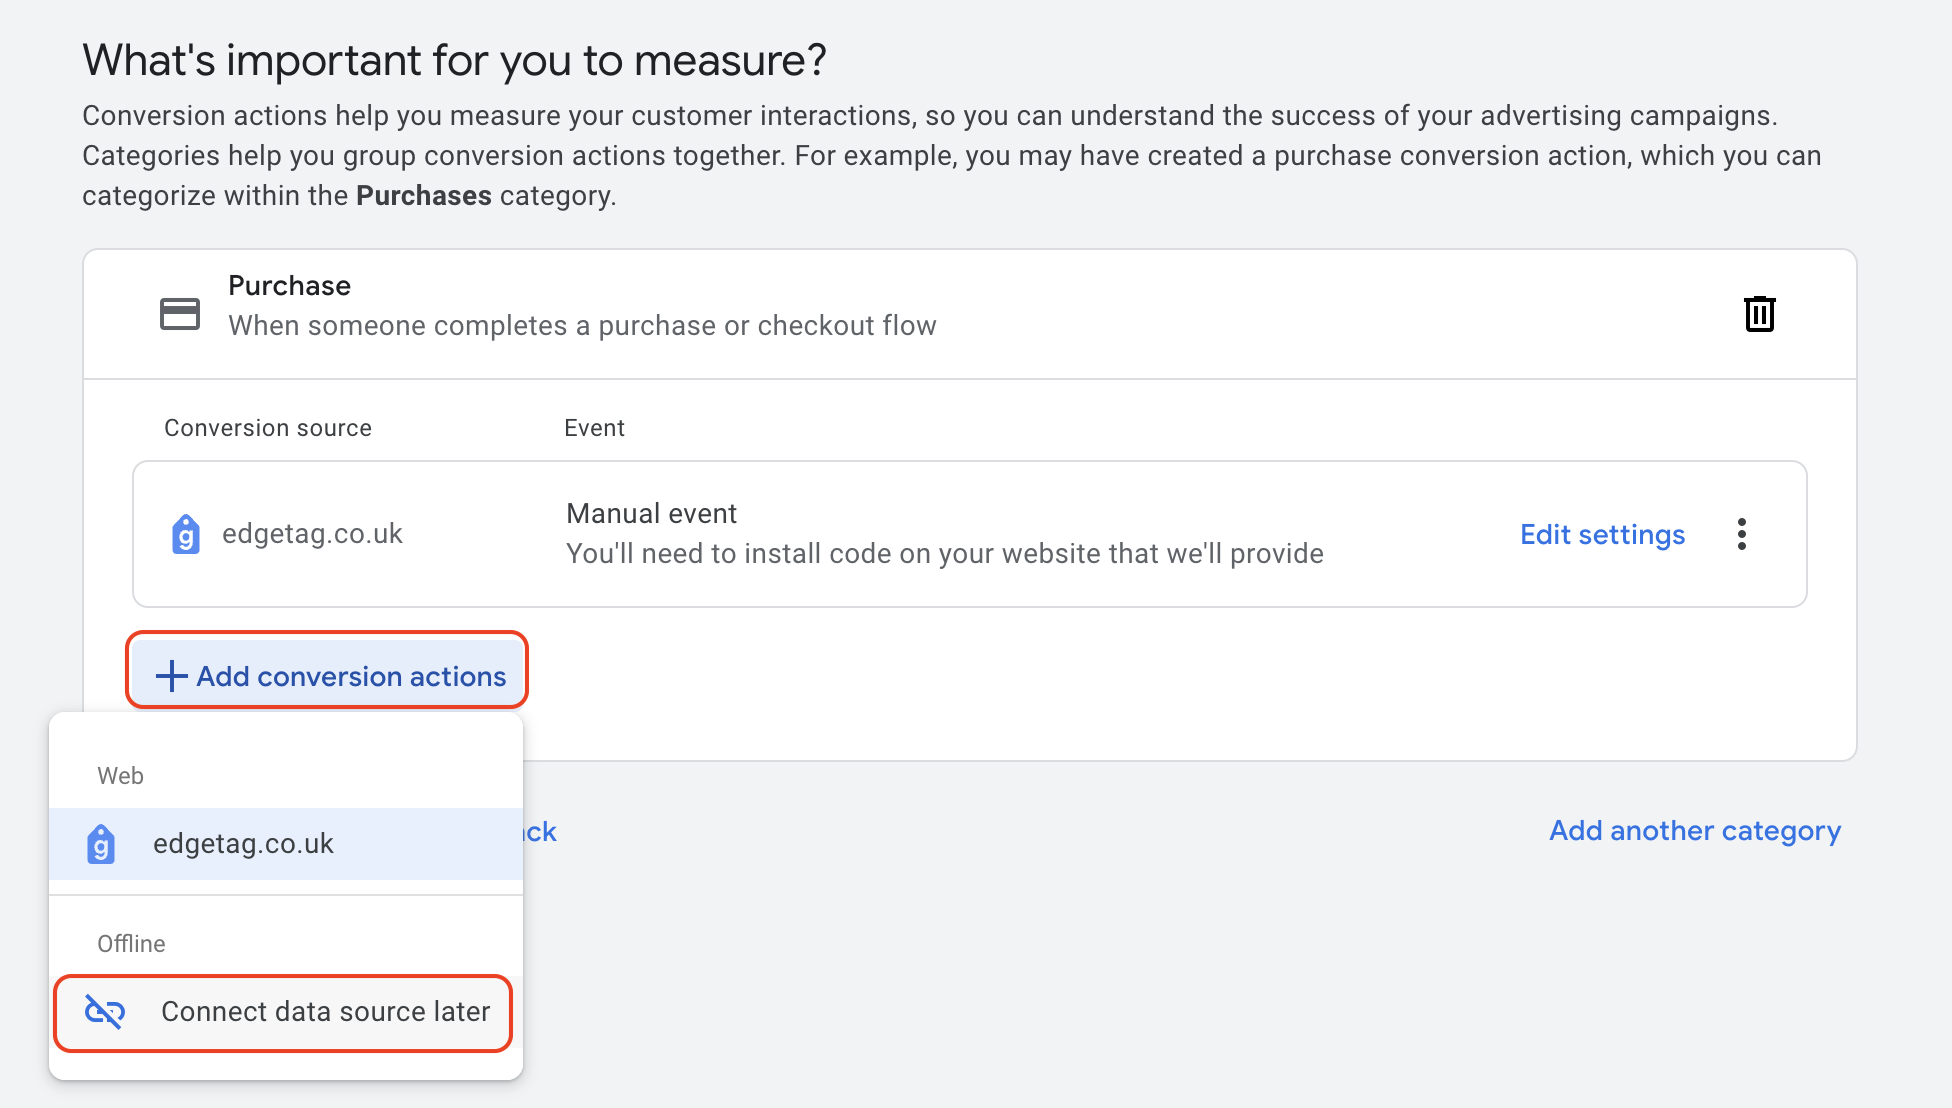
Once the category is selected, please click on Add conversion actions and select the offline option (since we are creating a server conversion action).
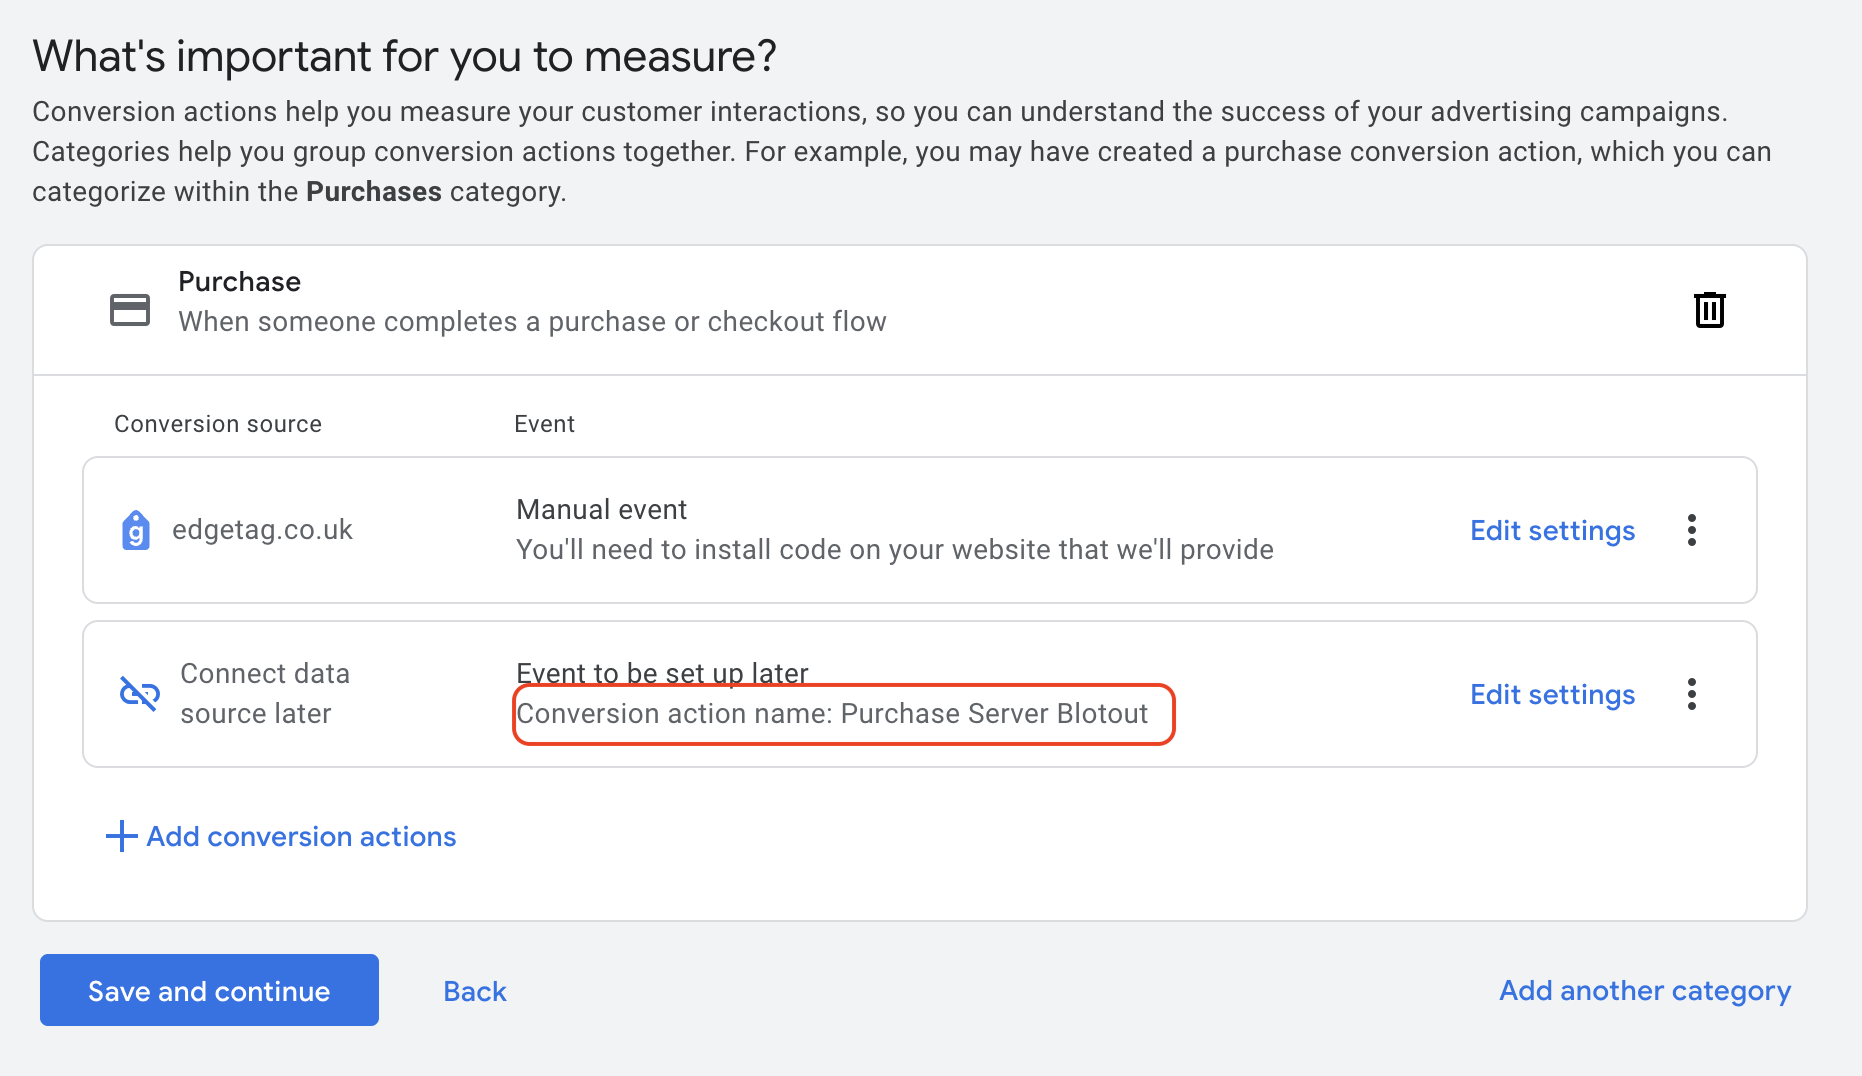
Once the offline source is selected, you would immediately see a skeleton conversion created for you, please click on Edit settings and update the settings for it to your preference.
In the pop-up, configure the conversion action settings, such as the conversion action name and click-through windows.
{% hint style="info" %}
If you already have primary conversion actions, please change Action optimization to secondary to not affect existing campaigns. Later, once the data looks good, we can move it to the primary.
{% endhint %}
Click "Save and Continue" to proceed. The conversion action has been created successfully. Click "Done," and you will be redirected to the Conversions summary page.
You should now see the server conversion action we just created in the dashboard.
### I am getting the " This app is blocked error when trying to authenticate. How to fix that?
If you encounter an image like this in your process, there is no need to worry. Some companies apply more strict rules for Google Workspaces. You will need to add our app to the list of trusted apps. For this process, you need to be the Administrator of your Google Workspace.
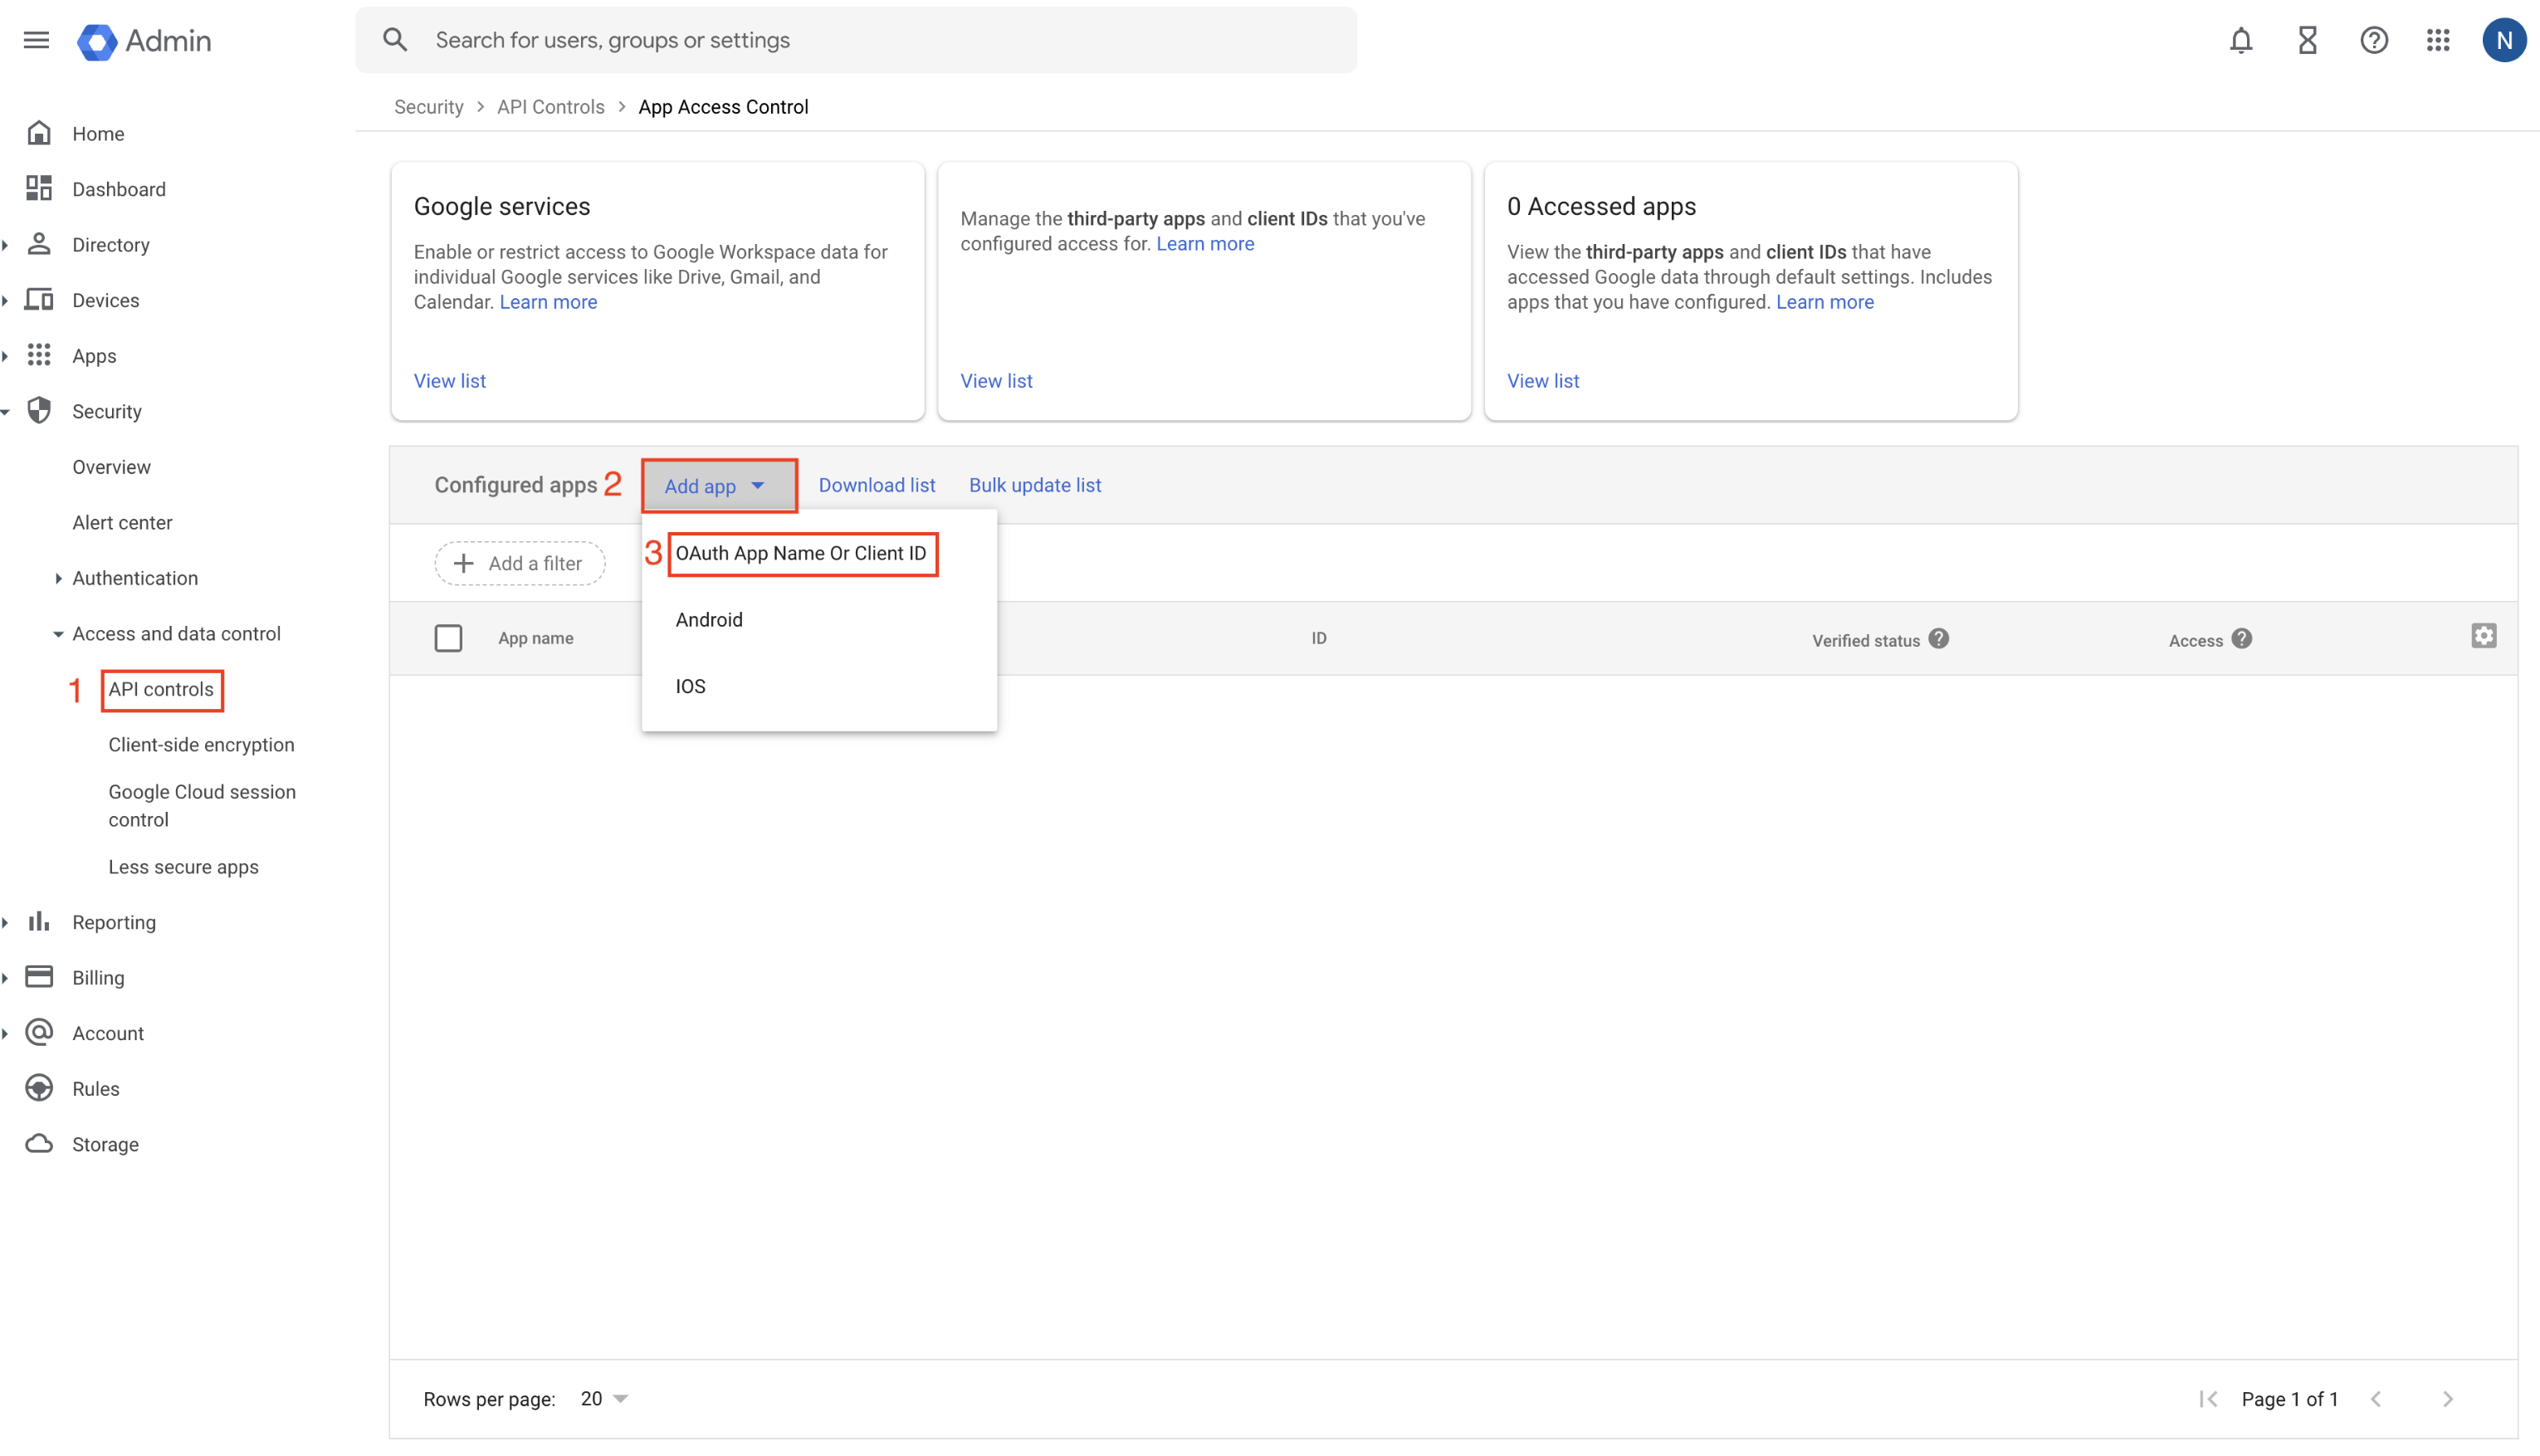
First, navigate to your [Google Admin Console > Security > Access and data control > API controls](https://admin.google.com/ac/owl?hl=en) and click on Manage third-party app access.
Click on Add app > OAuth App Name or Client ID.
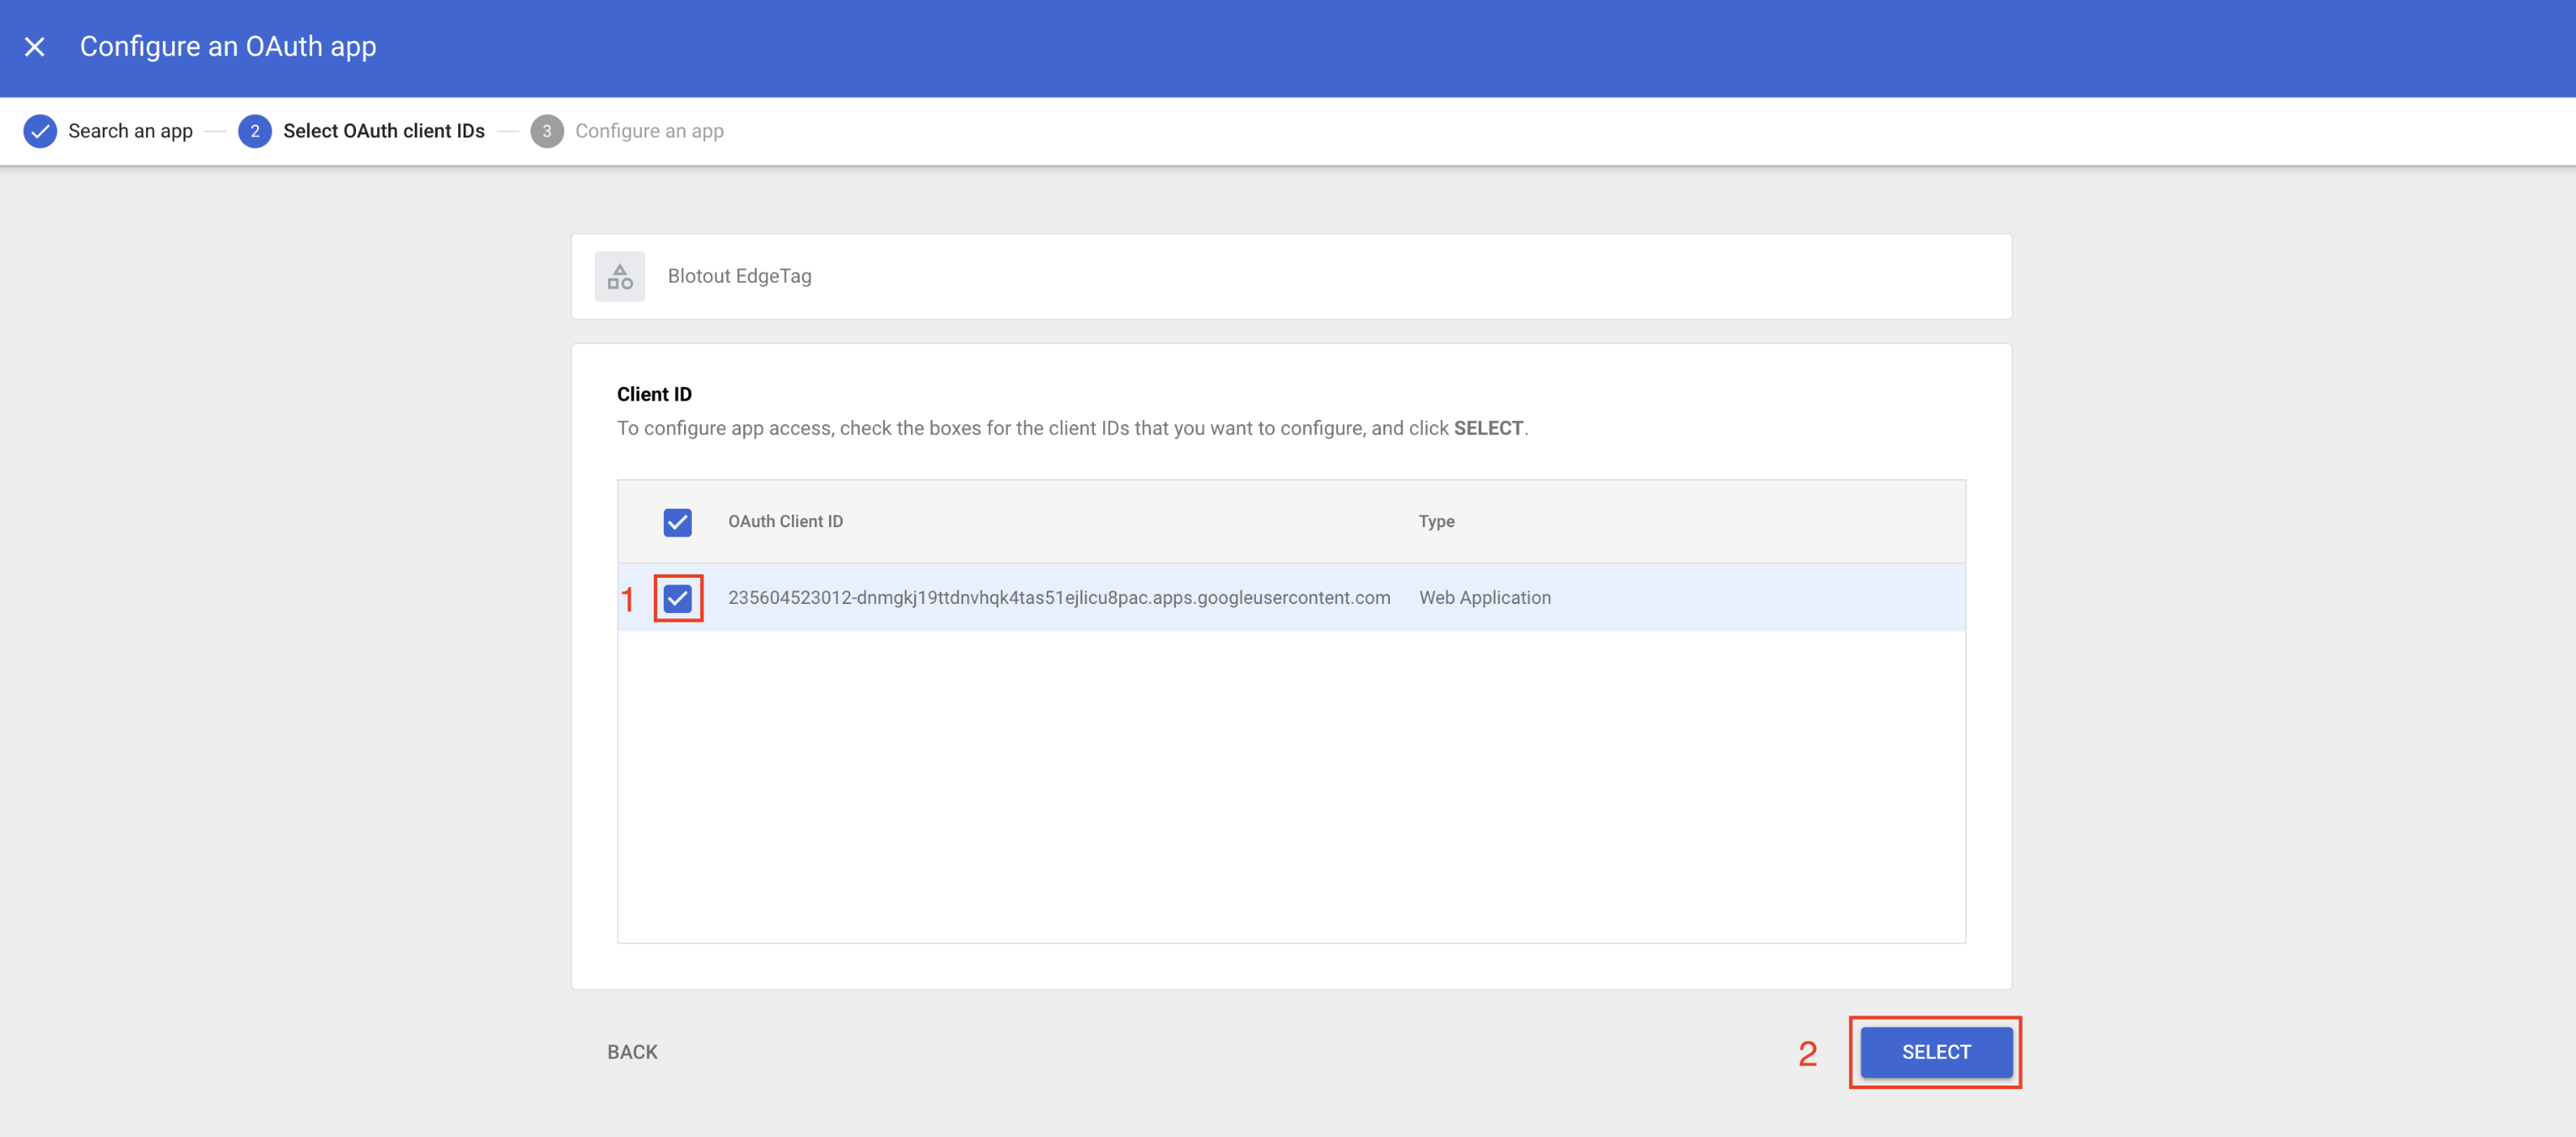
In search, enter our App ID `235604523012-dnmgkj19ttdnvhqk4tas51ejlicu8pac.apps.googleusercontent.com`, click Search, and then click on it.
You will need to click on the checkbox and then click Select.
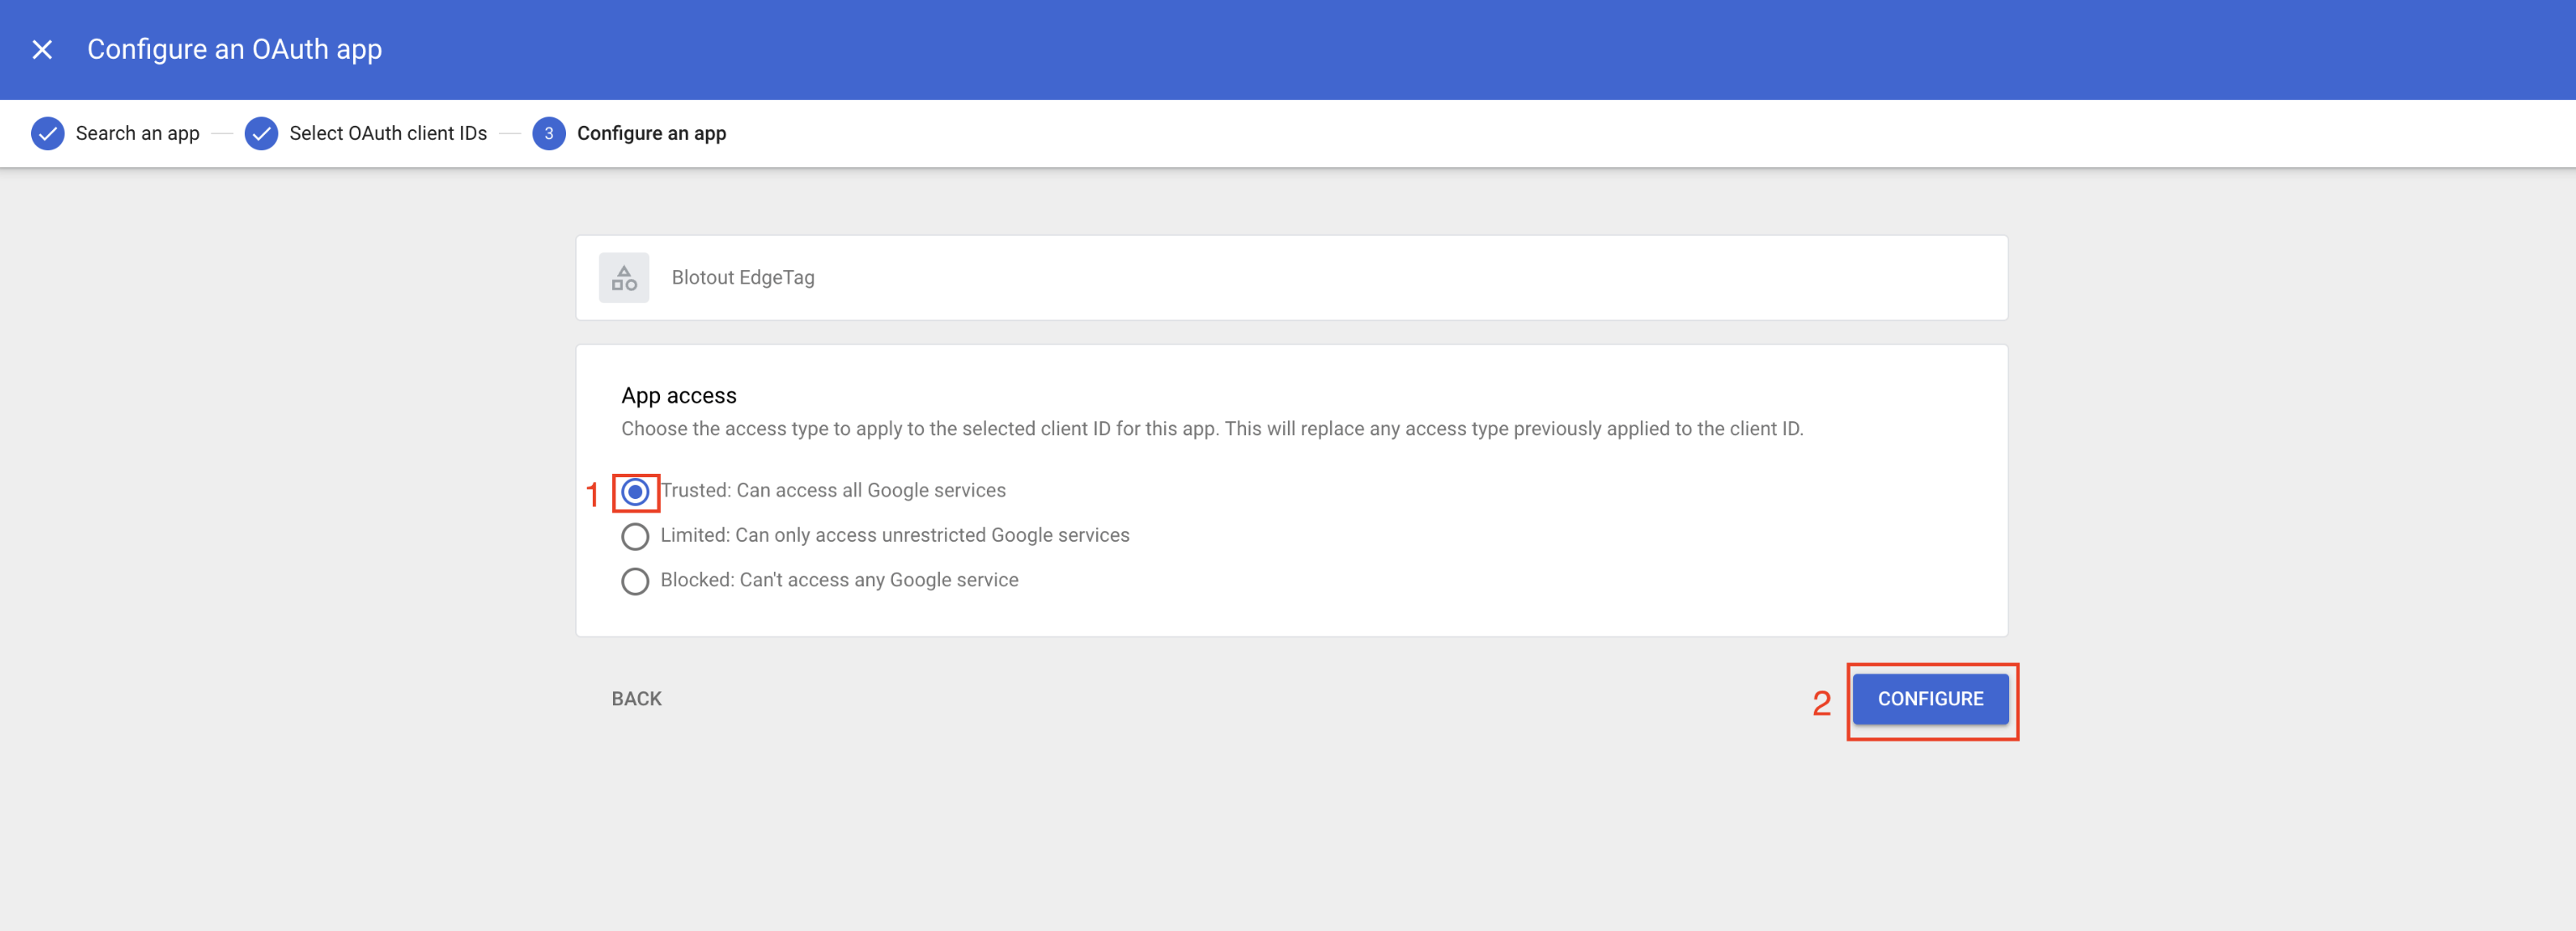
On the next screen, select 'Trusted: Can access All Google services' and click 'Configure'.
You have successfully added our app to your list of allowed apps. Now you can go back to our app and try adding the Google Ads provider again.
### How to report Profit Margins in Google Ads?
To report profit margins in Google Ads, you must first send cart data along with the conversion. Please configure both the Merchant ID and Identifier Format fields in the Google Ads form within EdgeTag, if they haven't been configured yet. These fields are required to attach cart data to the conversion.
{% hint style="info" %}
Once that is done, please refer to Google's official guide to [report profit margins](https://support.google.com/google-ads/answer/14944137?hl=en\&ref_topic=14944136\&sjid=284824452501880859-NC#zippy=%2Cset-up-with-google-ads) in Google Ads.
{% endhint %}
---
# Agent Instructions
This documentation is published with GitBook. GitBook is the documentation platform designed so that both humans and AI agents can read, navigate, and reason over technical content effectively. Learn more at gitbook.com.
## Querying This Documentation
If you need additional information that is not directly available in this page, you can query the documentation dynamically by asking a question.
Perform an HTTP GET request on the current page URL with the `ask` query parameter, and the optional `goal` query parameter:
```
GET https://docs.edgetag.io/channels/google-ads/faq.md?ask=&goal=
```
`ask` is the immediate question: it should be specific, self-contained, and written in natural language.
`goal` is optional and describes the broader end goal you are ultimately trying to accomplish on behalf of the user. GitBook uses it to tailor the answer towards what is most useful for that goal.
The response will contain a direct answer to the question and relevant excerpts and sources from the documentation.
Use this mechanism when the answer is not explicitly present in the current page, you need clarification or additional context, or you want to retrieve related documentation sections.